
Note: Before you can use this integration, your Platform Owner must complete the SharePoint admin consent step, and you need to have SharePoint connected in your Connected Apps.
Method 1 — Import into a single vault
1. Navigate to Vault Manager in the lower left hand corner of your screen, and under the Vaults tab, open the vault you want to add files to.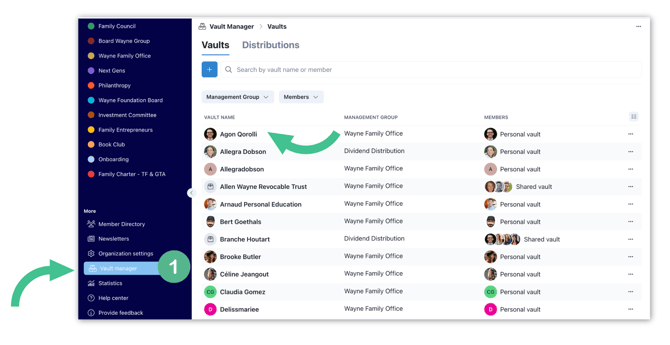
2. Click the + button next to the search bar, then choose Distribute Files. 

4. In the Add from SharePoint dialog, tick the SharePoint sites and drives you want to access, then click Next. 
5. Browse the folder structure and tick the items you want to import. You can select individual files, an entire folder, or a mix of both — selecting a folder pulls in everything inside it. Click Preview when your selection is complete. 
6. Back in the distribution dialog, the Uploads tab shows your imported files with a green check mark next to each. Switch to the Options tab to set the destination folder, apply labels, enable a watermark, or prevent download, and to the Message tab to write a short note to recipients, then click Distribute.

Method 2 — Import into multiple vaults at once
Use this method when you want to distribute the same documents to recipients across multiple vaults.
1. In Vault Manager, open the Distributions tab and start a new distribution.
2. In the Upload Files area, click the SharePoint link, then select the site or drive you want to browse and click Next. 
3. In the Add from SharePoint dialog, tick the SharePoint sites and drives you want to access, then click Next.

4. Navigate the folder picker and tick the files you want to import. Click Preview to confirm your selection.

5. Select Import. Imported files appear in the Uploads list. For each file, use the row icons to set a recipient vault (or auto-assign), restrict download, add a watermark, choose a destination folder, or add labels.

6. When everything is in place, click Start Distribution. Use Save for later if you want to come back to it.
Note: Trusted Family preserves the SharePoint folder structure on import — the folders you select get re-created in the destination vault automatically.
Pro tip: Combine Watermark and Prevent download for sensitive files like financial statements or governance documents. Recipients can read the file in the platform but cannot save a clean copy.