1. When you click in to the Surveys app, you will be on the home screen, which looks like this:
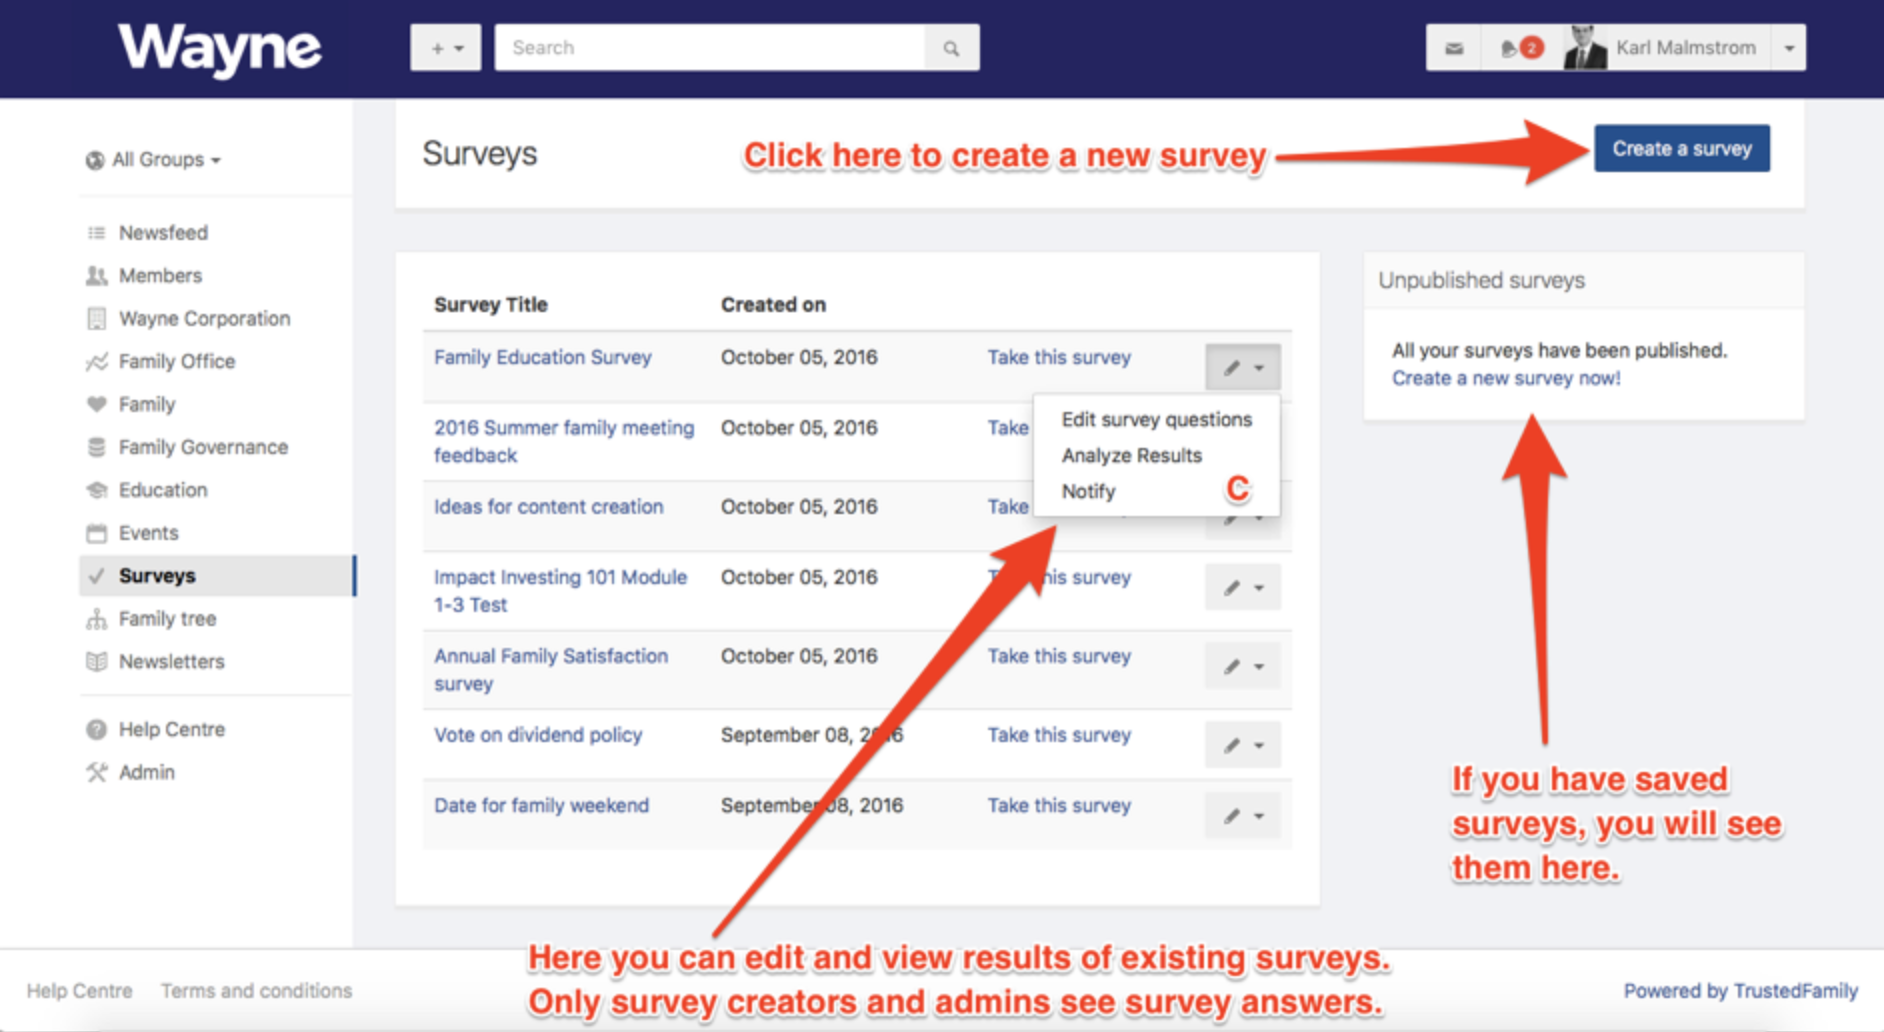
If you've never created a survey before, the screen above will not show any previous surveys. Let's get started and create one!
2. First, you will be asked to name your survey. Think about a catchy title to increase your chances of people filling it out. Watch our video on titles for tips and tricks. You need to make sure that the right people have access to this – either individually or by group. And you also have options to:
-
Allow users to change their replies – which is useful if you have a survey that people may need to change answers to.
-
Make responses anonymous – which is useful if you have sensitive issues to discuss.
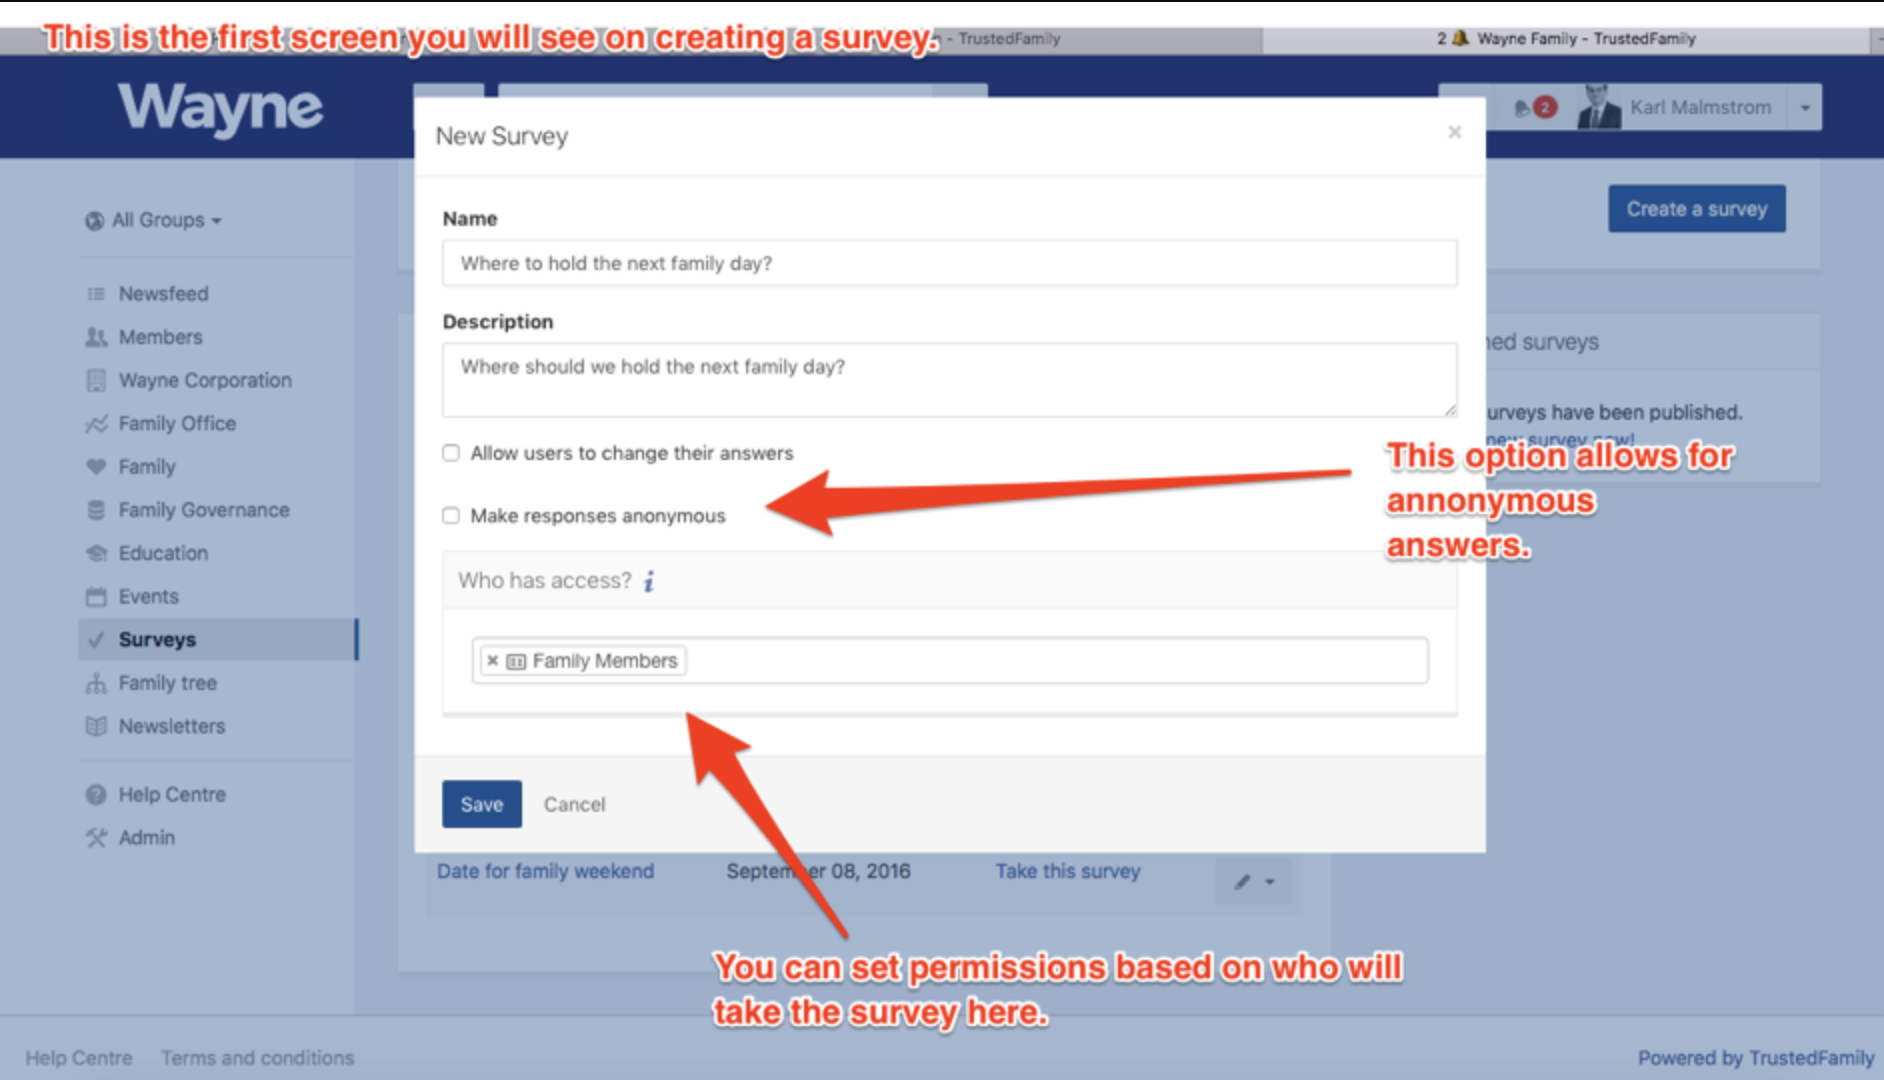
Once you have entered and saved the name and the description of your survey, you will be redirected to a new window. There you will be able to create your questions.
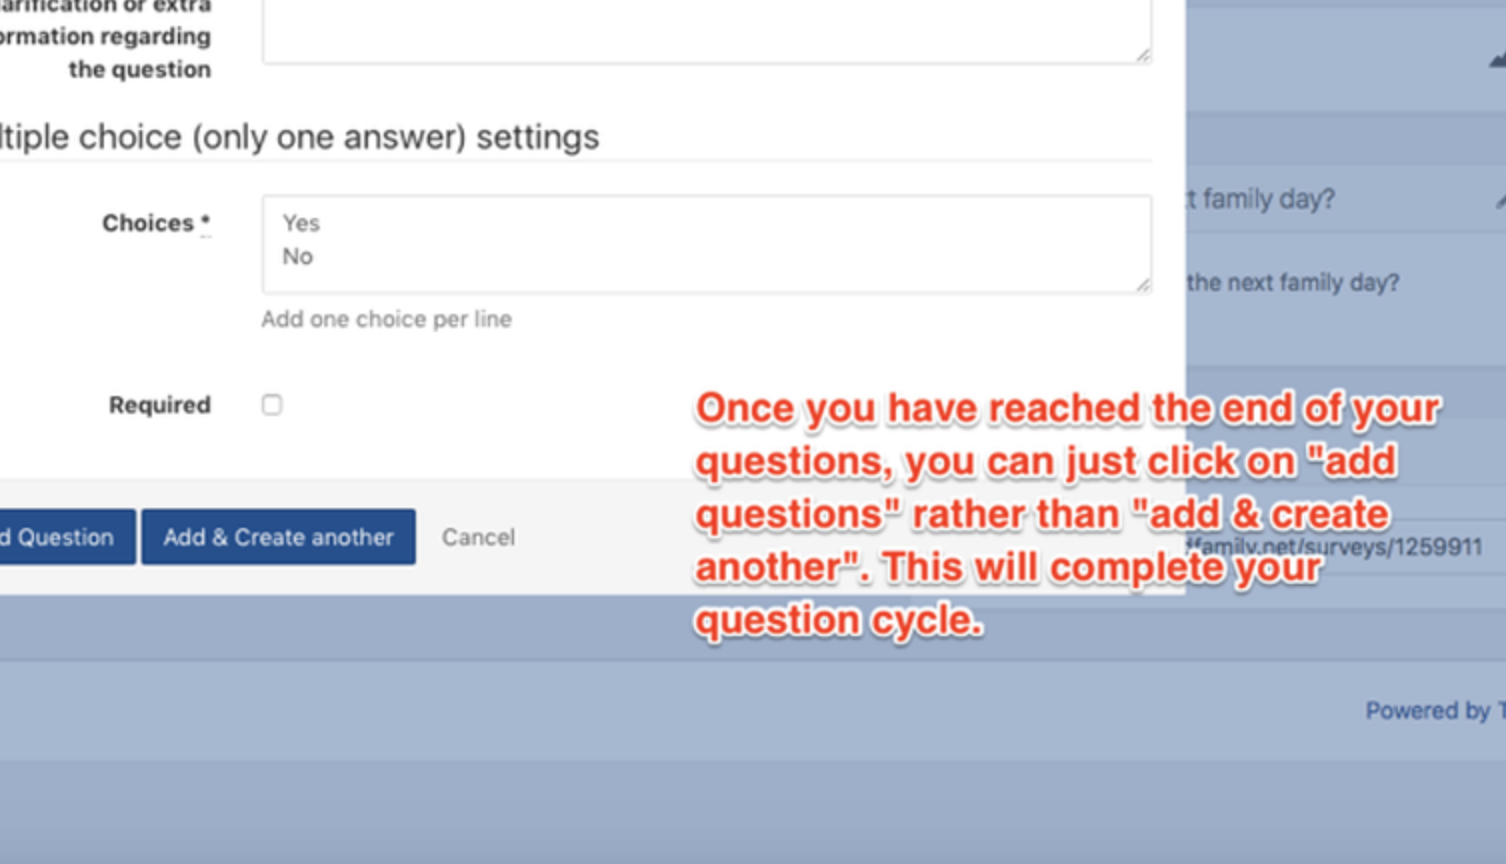
3. Insert the first question you would like to ask in your survey. Then decide the type of answer you would like to get. Text box, date, numerical and so on. Then decide if you would like to add this one question or add and create another.
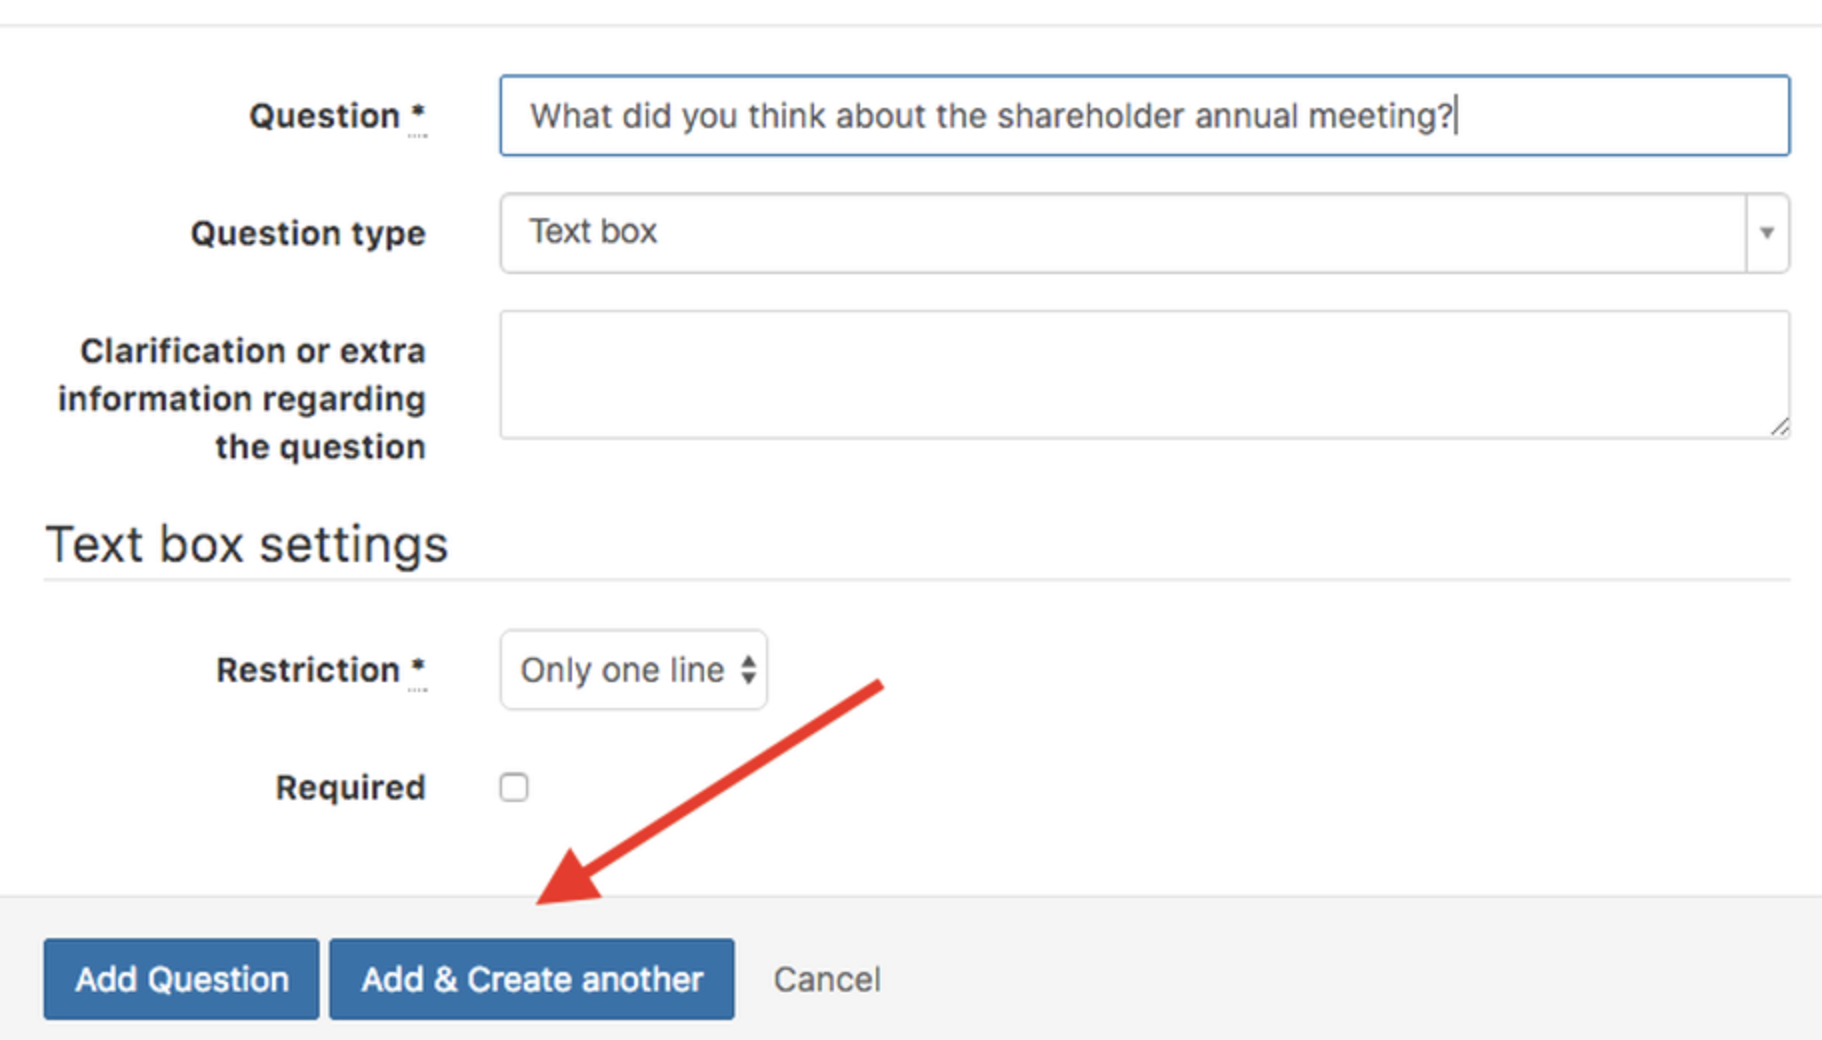
Each question will be entered on a separate screen so make sure you have the questions in the right order. You can change the order later, but it helps if you have it sorted out to begin with.
There are eight types of answer formats you can set for a question:
1. Text Box – if you just want people to type in an answer.
2. Checkbox Question – if you want to give people a binary choice to select the answer or not.
3. Numerical Box – if you have a numerical value to be filled in, use this choice.
4. Date and Time Selection – if you want people to respond with a time & date, use this choice.
5. Multiple Choice (only one answer) – If you have a selection of answers where the user should select only one choice, choose this option.
6. Multiple Choice (multiple answers) – if you have a selection of answers where the user should be able to select more than one answer, use this option.
7. Matrix of Choices (only one answer per row) – if you have e.g. a feedback questionnaire where the questions are down the left-hand side and a scale is on the right hand side, use this one. Then people can select e.g. “8 out of 10” for “how good was the venue” etc.
8. Matrix of Choices (multiple answers per row) - If you would like the user to be able to give more than one option per line in the matrix, use this option.
You will then have a choice to make the question mandatory or not by clicking on the “required” check box. If a question is required, the user cannot proceed without answering it.
4. Once you have finished creating your survey, you will be taken to your survey’s home screen. You have a number of options here, including those listed in the below screenshot. Note that to change the order of the questions, you can click on the “up-and-down” arrow box on the right hand side of the question, to the left of the “edit” and “delete” buttons.
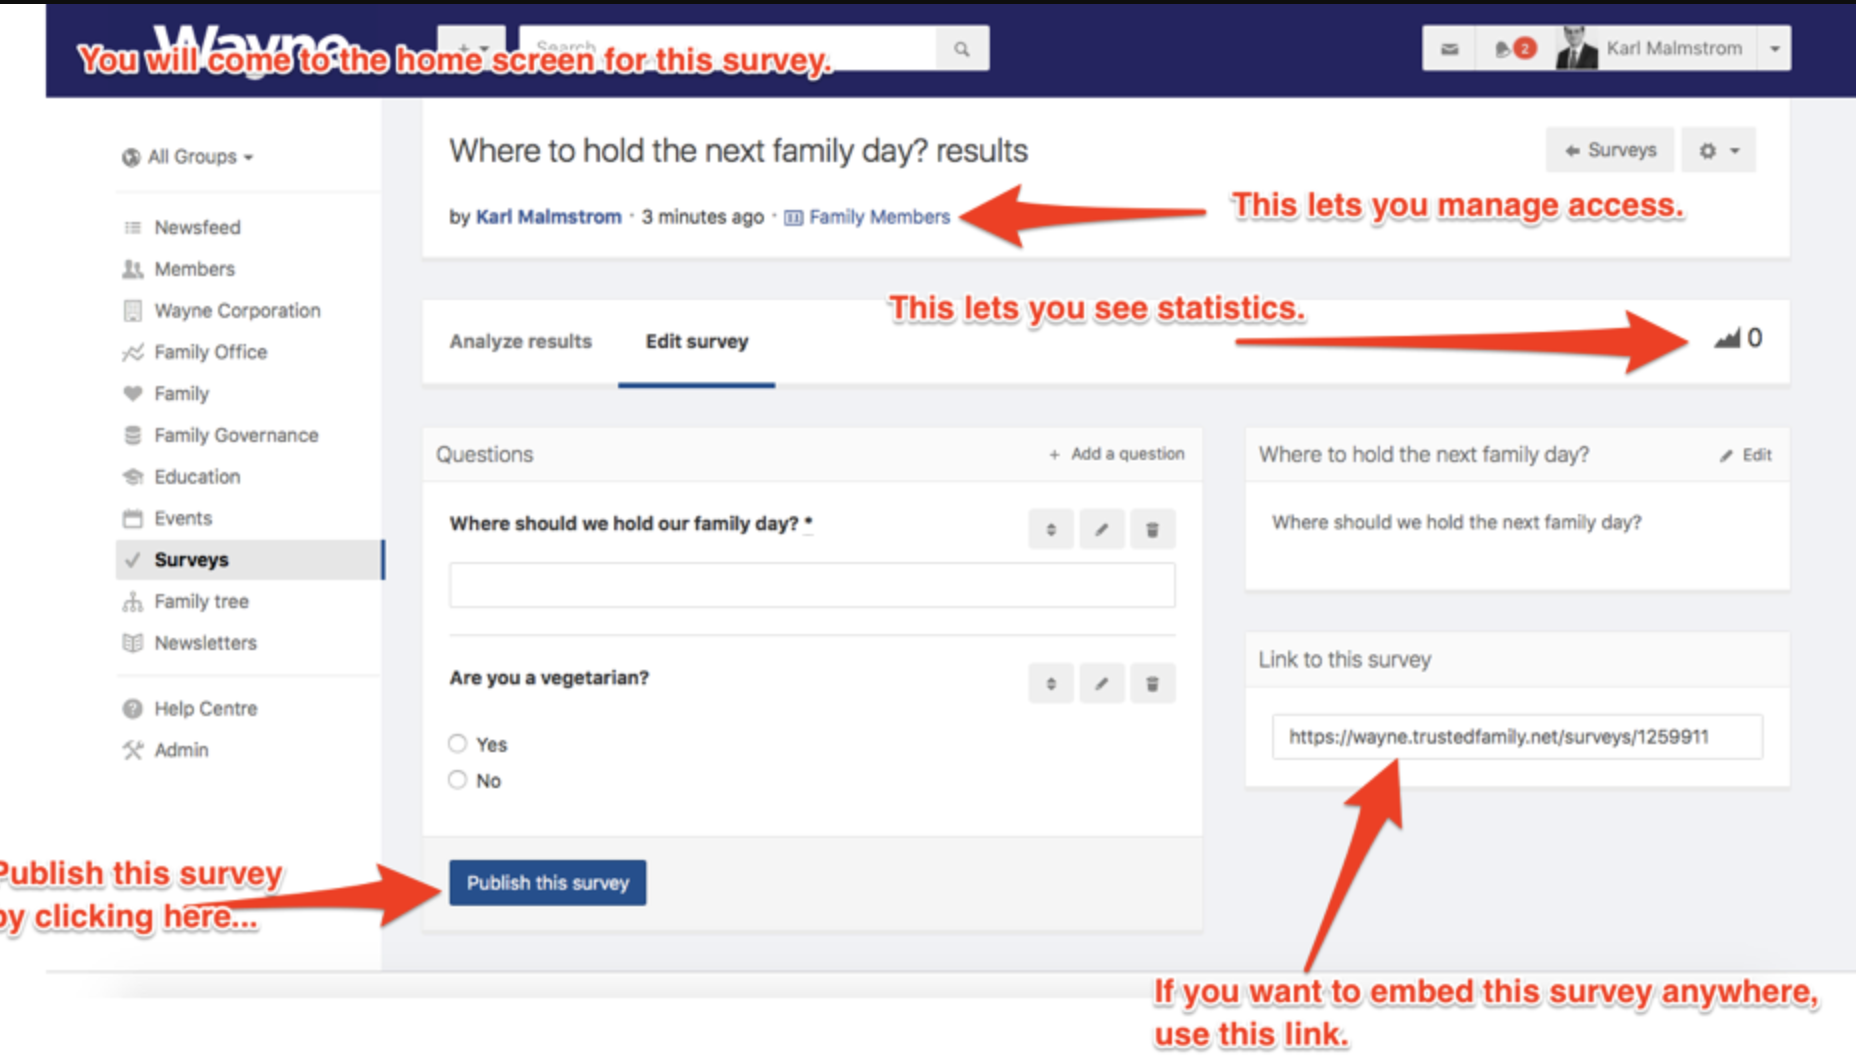
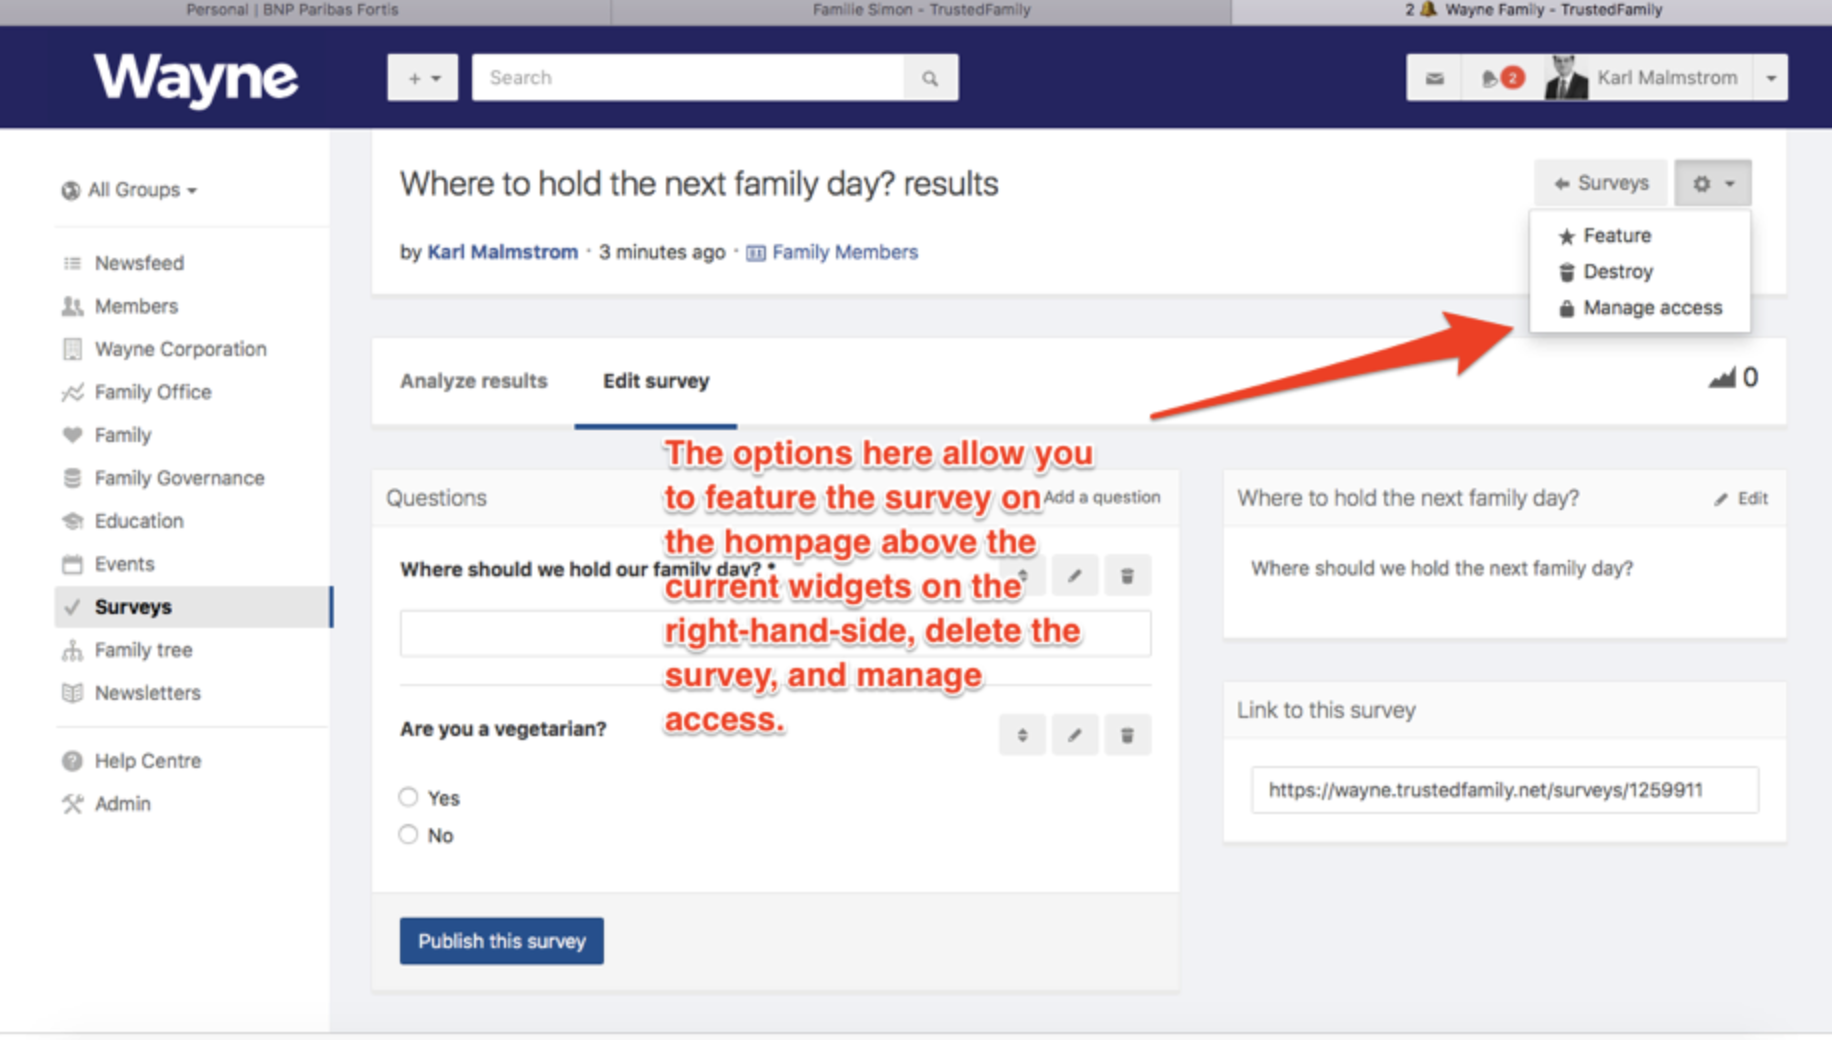
As with most Trusted Family features, you also have an options “cog” in the top right-hand corner. This gives you some more options:
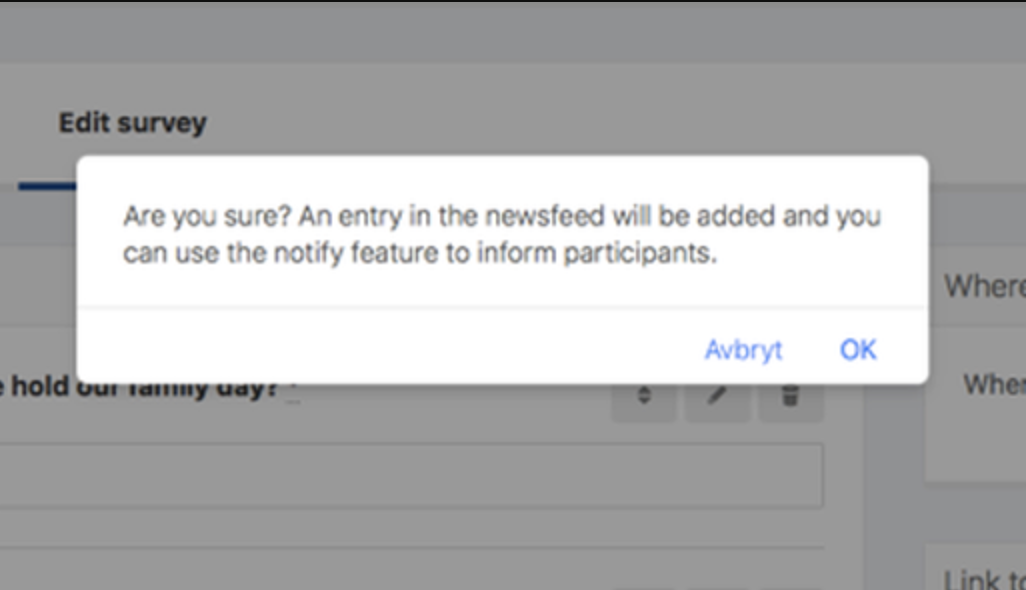
5. Once you click “publish”, you will be asked to confirm your choice:
BONUS
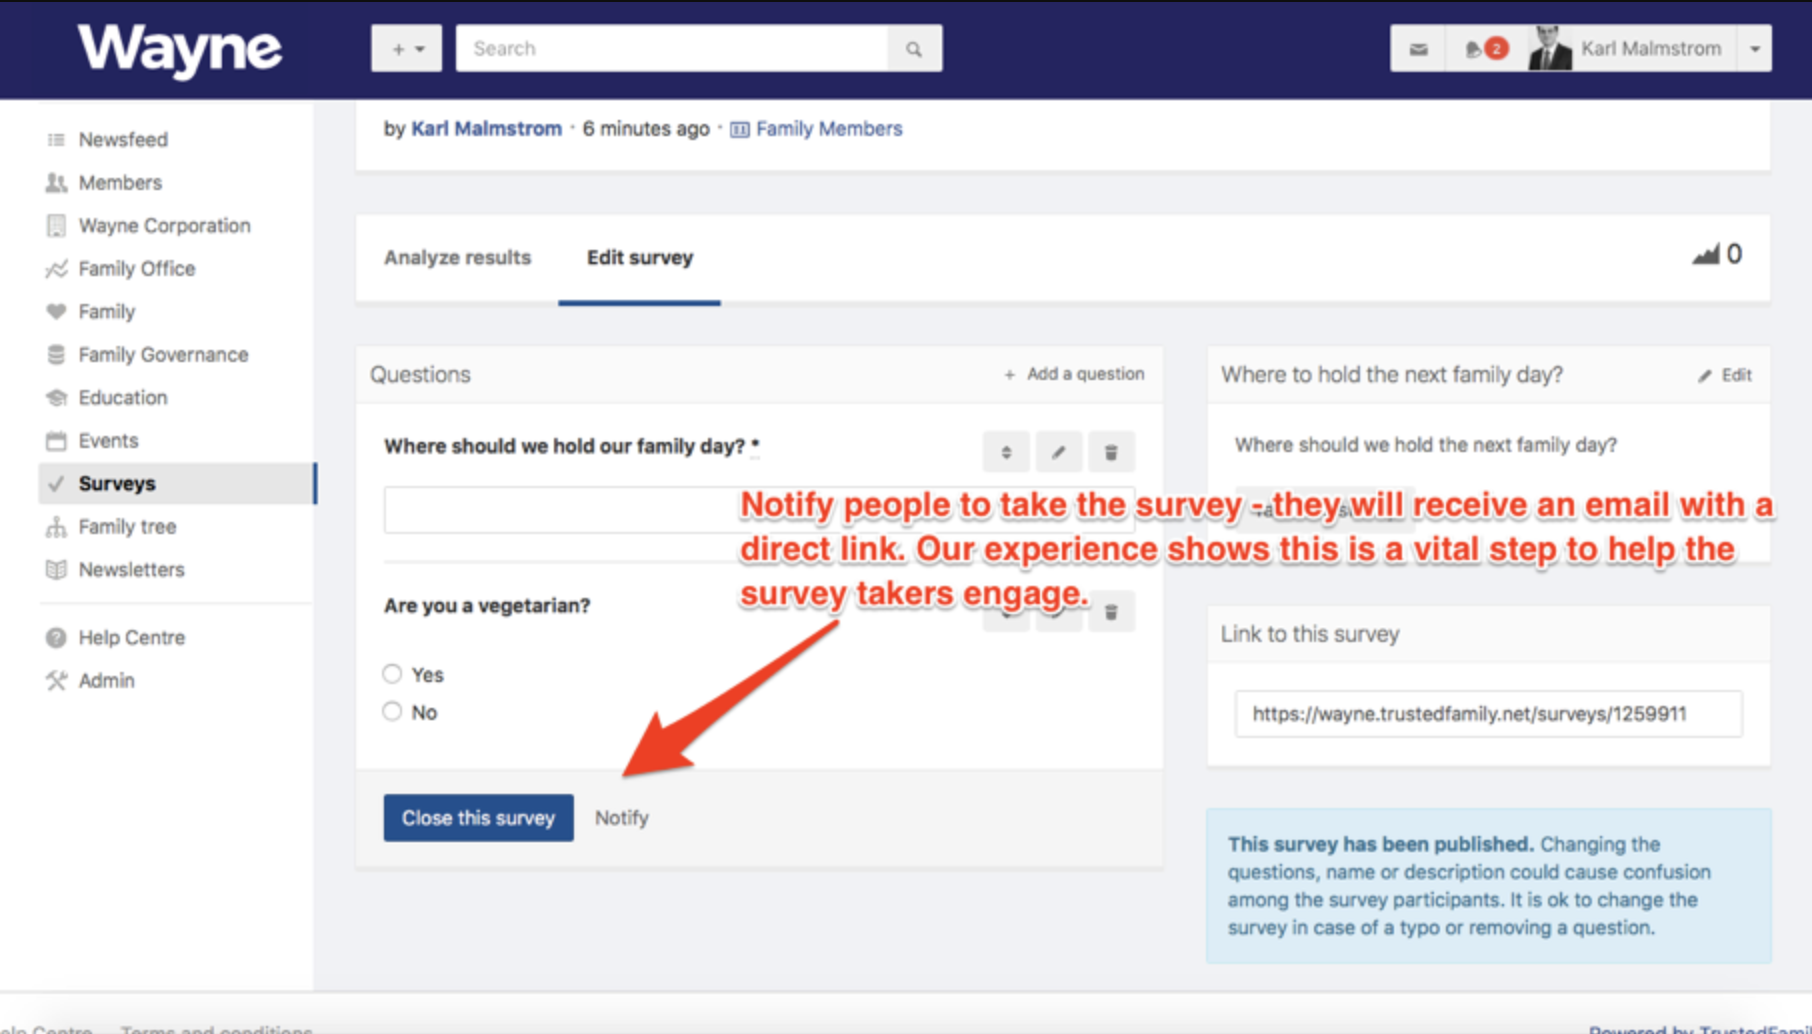
6. Click on 'Notify' to send a link with the survey via email to the users.